Kombucha has gained immense popularity in recent years due to its numerous health benefits. This fermented tea is not only delicious but also packed with probiotics and antioxidants that promote gut health and boost the immune system. While it’s readily available in stores, making kombucha at home allows you to have full control over the ingredients and flavors, ensuring a healthier and more personalized beverage. In this article, we will guide you through the step-by-step process of making kombucha in the comfort of your own kitchen.
Before diving into the brewing process, let’s take a closer look at what exactly kombucha is. Kombucha is made by fermenting sweetened black or green tea using a symbiotic culture of bacteria and yeast (SCOBY). The SCOBY consumes the sugar in the tea while producing beneficial acids, enzymes, vitamins, and trace amounts of alcohol. It’s important to note that while commercial varieties may contain higher levels of alcohol due to longer fermentation times, homemade kombucha typically has an alcohol content below 0.5%.
To get started with making your own kombucha at home, you’ll need a few basic supplies:
1. A large glass jar: Look for one that can hold at least one gallon (3.8 liters) of liquid.
2. Tea: Choose between black or green tea leaves; ensure they are organic and free from any added flavors.
3. Sugar: Opt for organic cane sugar instead of refined white sugar as it provides essential nutrients for SCOBY growth.
4. SCOBY: You can either obtain a SCOBY from a friend who brews their own kombucha or purchase one online or from local suppliers.
5. Starter liquid: This refers to already brewed plain kombucha used as an inoculant during fermentation.
Once you have gathered all your supplies, follow these steps:
Step 1: Prepare Your Ingredients
– Boil four cups (950 ml) of water.
– Add four tablespoons (60 ml) of tea leaves to a heatproof container.
– Pour the hot water over the tea leaves and let steep for 5-10 minutes.
– Strain the tea leaves and dissolve one cup (200 grams) of sugar into the hot tea.
Step 2: Cool Down Your Tea
Allow your sweetened tea to cool completely. It’s essential that it reaches room temperature before adding your SCOBY to avoid damaging the culture.
Step 3: Add SCOBY and Starter Liquid
Gently place your SCOBY on top of the cooled sweetened tea. Make sure clean hands are used during this step. If you received liquid with your SCOBY, pour it into the jar as well. The starter liquid helps ensure proper fermentation by introducing beneficial bacteria and yeast strains.
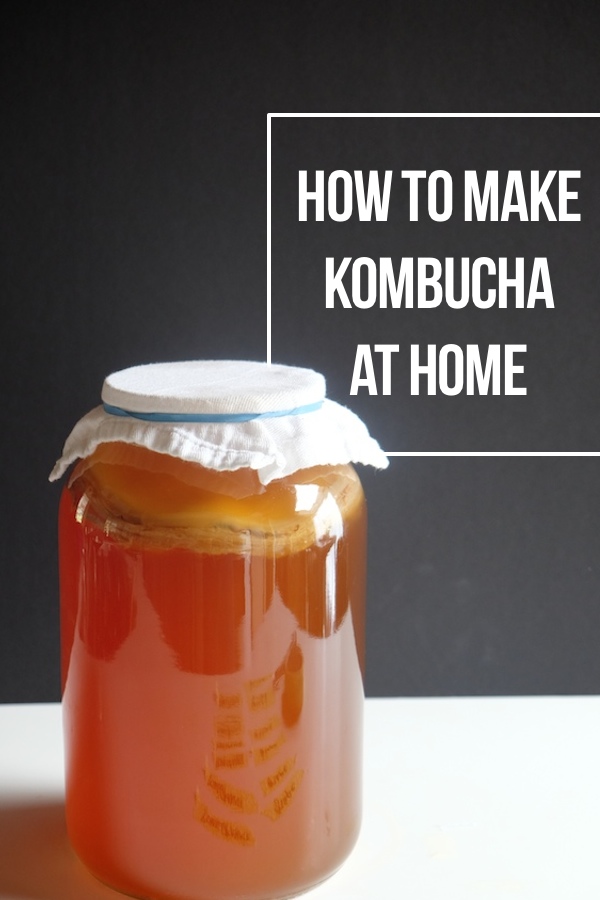
Step 4: Cover and Ferment
Cover your jar with a breathable cloth or coffee filter secured with a rubber band. This allows airflow while preventing dust or insects from contaminating your brew. Place the kombucha jar in a warm spot away from direct sunlight where it can ferment undisturbed for about seven to fourteen days.
During this period, check on your kombucha periodically but avoid unnecessary agitation, which could disturb SCOBY formation. You may notice bubbles forming on top, which is an indication that fermentation is taking place.
Step 5: Taste Test
After seven days, begin tasting your kombucha daily until you reach an optimal flavor balance between sweetness and acidity. The longer you ferment, the more tart and acidic it will become. Once you’re satisfied with its taste profile, move on to bottling.
Step 6: Bottle Your Kombucha
Using clean glass bottles with tight-fitting lids, carefully pour your fermented kombucha into them while leaving some headspace at the top (about an inch). You can strain out any solid particles if desired using a fine-mesh strainer or cheesecloth. This step is also an excellent opportunity to experiment with flavoring your kombucha by adding fruits, herbs, or spices.
Step 7: Second Fermentation (Optional)
If you prefer a fizzy kombucha similar to store-bought varieties, consider a second fermentation period. Seal the bottles and let them sit at room temperature for one to three days. The natural sugars in the added ingredients will be further consumed by the bacteria and yeast, producing carbon dioxide that creates effervescence.
Step 8: Refrigerate and Enjoy
Once you’ve achieved your desired level of carbonation during the second fermentation, refrigerate your bottles. Cold temperatures slow down fermentation and help retain carbonation. Your homemade kombucha is now ready to be enjoyed!
Remember to reserve some of the fermented tea as starter liquid for future batches, along with a new SCOBY that forms on top during each brewing cycle.
While making kombucha at home is relatively simple, it’s crucial to maintain proper hygiene throughout the process. Cleanliness helps prevent unwanted bacteria from contaminating your brew and ensures a successful batch every time.
In conclusion, brewing kombucha at home can be a rewarding experience that allows you full control over ingredients and flavors while reaping its health benefits. By following these steps carefully, you’ll soon find yourself sipping on deliciously tangy homemade kombucha without breaking the bank or compromising on quality. Cheers to good gut health!
Leave a Reply