Raspberry jam is a delightful addition to any breakfast table. Its vibrant color and sweet-tart flavor can elevate simple toast or oatmeal into a special treat. While store-bought raspberry jam is convenient, making your own at home can be a rewarding experience that not only saves you money but also allows you to control the quality of ingredients used. In this post, we will explore how to make DIY raspberry jam for less money while still enjoying a delicious and healthy spread.
One of the main advantages of making your own raspberry jam is that you can choose high-quality ingredients that suit your preferences. By selecting fresh raspberries from local markets or farms during peak season, you not only support local producers but also ensure that your jam has optimal taste and nutritional value. Additionally, by buying in bulk when raspberries are in season and freezing them for later use, you can save money compared to purchasing pre-made jams at the store.
To make raspberry jam at home, you will need just a few simple ingredients: fresh raspberries, sugar (or alternative sweeteners), lemon juice, and pectin (optional). The key to successful jam-making lies in the proper balance of fruit, sugar, and acidity. Raspberries are naturally rich in pectin, which helps the mixture thicken and set into a spreadable consistency. However, adding additional pectin can help ensure a firmer texture if desired.
Start by washing and draining your raspberries thoroughly before transferring them to a large pot. Use a potato masher or fork to crush the berries slightly while heating them over medium heat on the stovetop. This process helps release their natural juices and flavors.
Once the raspberries have softened and released their juices, add sugar or alternative sweeteners such as honey or maple syrup to taste. The amount of sweetener needed will depend on personal preference and the sweetness of the berries themselves. Keep in mind that some fruits may require more sugar to achieve the desired level of sweetness while others may be naturally sweeter.
Next, stir in freshly squeezed lemon juice to balance the sweetness with acidity. Lemon juice not only enhances the flavor of the raspberries but also helps activate natural pectin formation for better thickening properties.
If using commercial pectin for added firmness, follow package instructions on when to incorporate it into your jam mixture. Some recipes call for adding pectin along with sugar at an early stage while others suggest mixing it towards the end of cooking once fruit has broken down sufficiently.
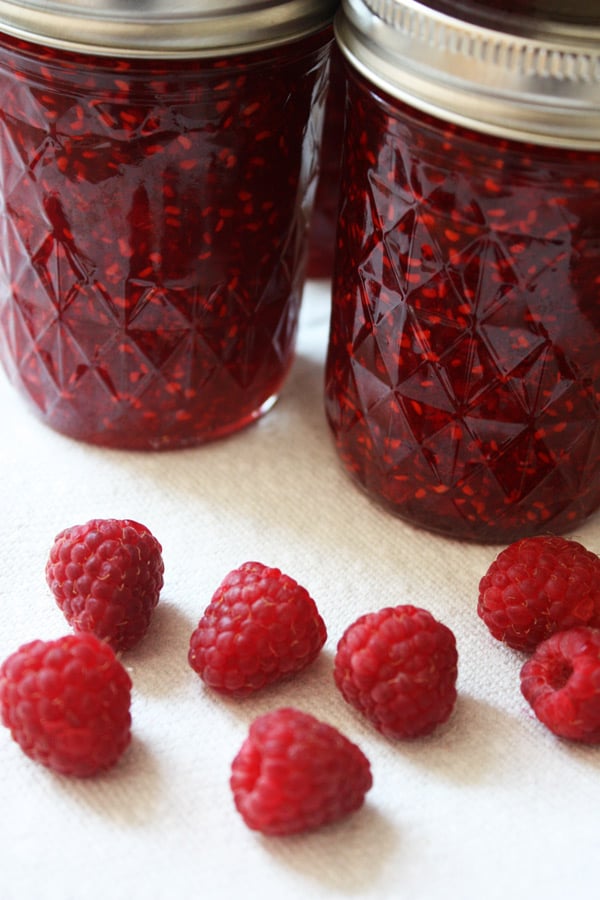
Allow your raspberry mixture to simmer gently until it reaches a thick consistency with a glossy appearance. Stir occasionally to prevent sticking or burning on the bottom of the pot. You can test if your jam is ready by placing a small amount on a chilled plate – if it sets up after cooling briefly in the refrigerator without running excessively, then it’s done!
Once your raspberry jam has reached its desired consistency, carefully ladle it into clean jars while still hot. Seal tightly with lids and allow them to cool completely before storing in the refrigerator or freezer for longer shelf life.
Homemade raspberry jam makes an excellent gift for friends and family during special occasions or holidays. With customizable labels and packaging options available online or at craft stores, you can create personalized jars that showcase your culinary skills and thoughtfulness.
In conclusion,
Making DIY raspberry jam is not only cost-effective but also allows you full control over ingredients used without compromising on flavor or quality.
By sourcing fresh raspberries during peak season from local markets or farms,
and buying in bulk when prices are low,
you can enjoy homemade preserves year-round at affordable prices.
Experimenting with different sweeteners such as honey,
maple syrup,
or even stevia adds versatility
to traditional recipes
while catering
to various dietary preferences.
Whether enjoyed simply spread on toast
or incorporated into baked goods like thumbprint cookies
and linzer tarts,
homemade raspberry jam adds brightness
and depth
to dishes through its natural flavors
and vibrant hue.
With proper sterilization techniques,
your homemade jams should keep well refrigerated for several weeks
or frozen for up
to six months
without significant loss
of quality.
Sharing these creations with loved ones fosters connections through food traditions passed down from generation
to generation
while sparking joy through thoughtful gestures made from scratch.
So why wait? Gather those ripe summer berries today,
roll up those sleeves,
and start preserving memories one jar at
a time!
Leave a Reply