Brussels sprouts, with their vibrant green color and unique taste, have become a popular vegetable among health-conscious individuals. Packed with essential nutrients and antioxidants, they offer numerous health benefits. While you can easily find Brussels sprouts in grocery stores year-round, growing your own at home can be a rewarding experience. Not only will you have access to fresh and organic produce, but you’ll also gain a deeper appreciation for the entire process of food cultivation. In this article, we’ll guide you through the steps of growing your own Brussels sprouts at home.
1. Choosing the Right Variety:
Before diving into planting your Brussels sprouts, it’s crucial to select the right variety that suits your climate and preferences. Some popular varieties include ‘Long Island Improved,’ ‘Jade Cross,’ and ‘Red Bull.’ Researching which varieties thrive in your specific region will ensure a successful harvest.
2. Preparing the Soil:
Like most vegetables, Brussels sprouts prefer well-draining soil that is rich in organic matter. Begin by loosening the soil using a garden fork or tiller to improve drainage and root penetration. Incorporate compost or aged manure into the soil to enhance its fertility and provide vital nutrients for plant growth.
3. Sowing Seeds Indoors:
For optimal results, start sowing seeds indoors about six weeks before the last frost date in springtime. Fill seed trays or small pots with high-quality potting mix and plant one or two seeds per container at a depth of ¼ inch (6mm). Keep them moist but not waterlogged until germination occurs within 7-10 days.
4. Transplanting Seedlings Outdoors:
Once seedlings reach around 2 inches (5 cm) tall with several sets of leaves, they are ready for transplanting outdoors after all danger of frost has passed. Choose a sunny spot in your garden where Brussels sprouts can receive at least six hours of sunlight daily. Space the seedlings about 24-36 inches (60-90 cm) apart to allow ample room for growth.
5. Providing Adequate Care:
Brussels sprouts require consistent care throughout their growing season. Water them regularly, aiming to keep the soil moist but not waterlogged. Mulching around the plants can help retain moisture and suppress weed growth. Fertilize every three weeks using a balanced organic fertilizer to ensure optimal nutrient availability.
6. Managing Pests and Diseases:
While Brussels sprouts are generally hardy, they may be susceptible to pests such as aphids, cabbage worms, and slugs. Regularly inspect your plants for any signs of infestation and take appropriate action if necessary. Introducing beneficial insects like ladybugs or using organic pest control methods can help keep these unwanted visitors at bay.
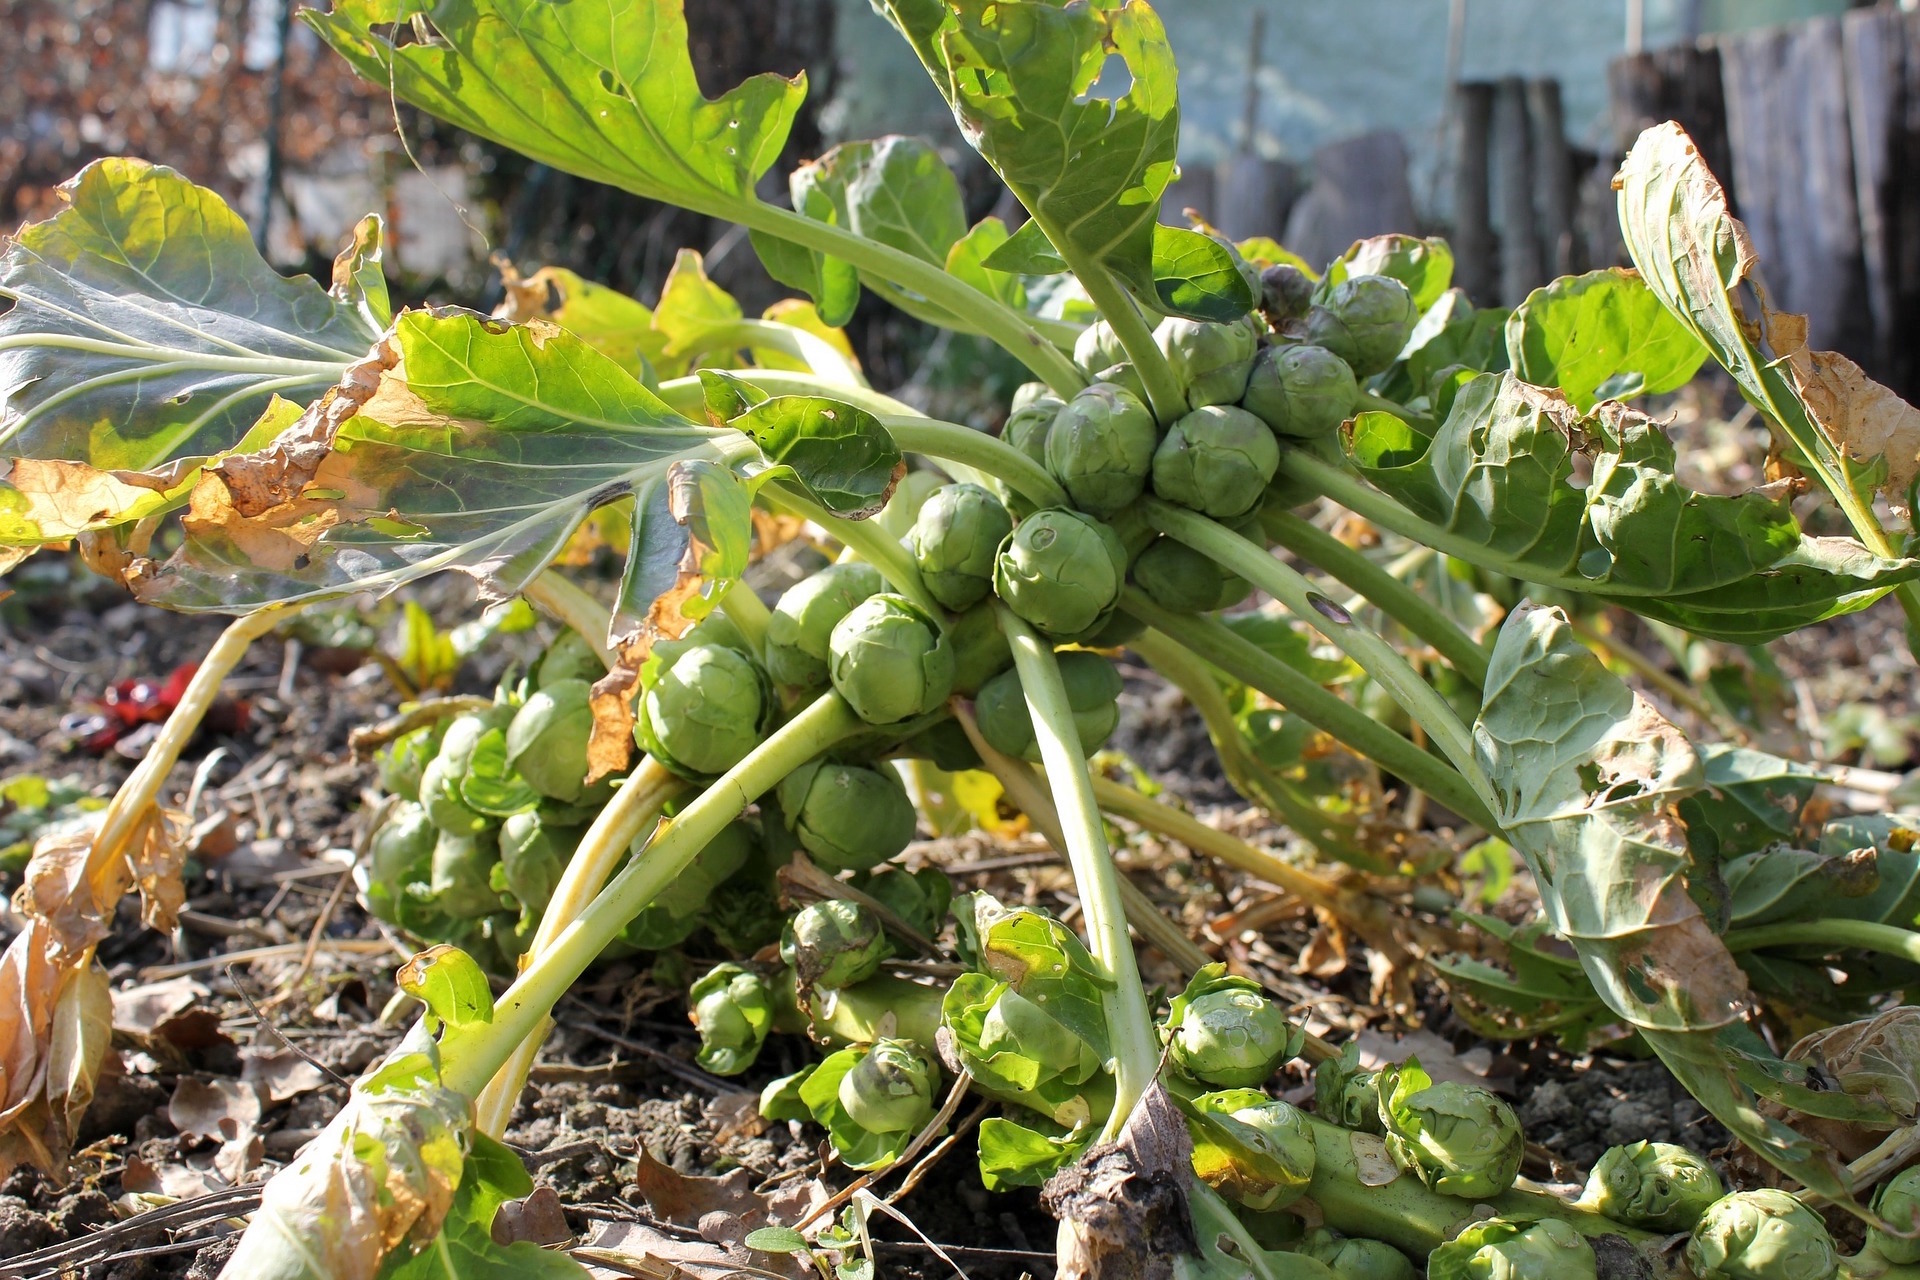
7. Harvesting Brussels Sprouts:
The harvesting timeline varies depending on the variety you choose; however, it typically ranges from 90 to 120 days after transplanting seedlings outdoors. Begin by picking off the lower leaves once sprouts start forming along the stem from bottom to top. This process encourages energy distribution towards larger sprout development while ensuring continuous growth until all sprouts are harvested.
8. Storing and Enjoying Your Harvest:
After harvesting, store Brussels sprouts in a cool place or refrigerate them in a plastic bag with some ventilation holes for up to two weeks without compromising taste or quality. Before cooking, remove any damaged outer leaves and trim a small amount from the stem end if needed.
9.Cooking Ideas:
Now that you have successfully grown your own Brussels sprouts, it’s time to experiment with various cooking methods! Roasting them with olive oil and sea salt brings out their natural sweetness while adding crispy texture. You can also steam or sauté them with garlic and herbs for a flavorful side dish. Additionally, try incorporating shredded raw Brussels sprouts into salads for a refreshing and nutritious twist.
10. Final Thoughts:
Growing your own Brussels sprouts at home can be a rewarding experience that allows you to cultivate fresh, organic produce while embracing the joy of gardening. With proper care and attention, you’ll soon enjoy a bountiful harvest of these nutrient-packed vegetables. So, roll up your sleeves, get your hands dirty, and embark on this exciting journey to grow your own Brussels sprouts!
Leave a Reply